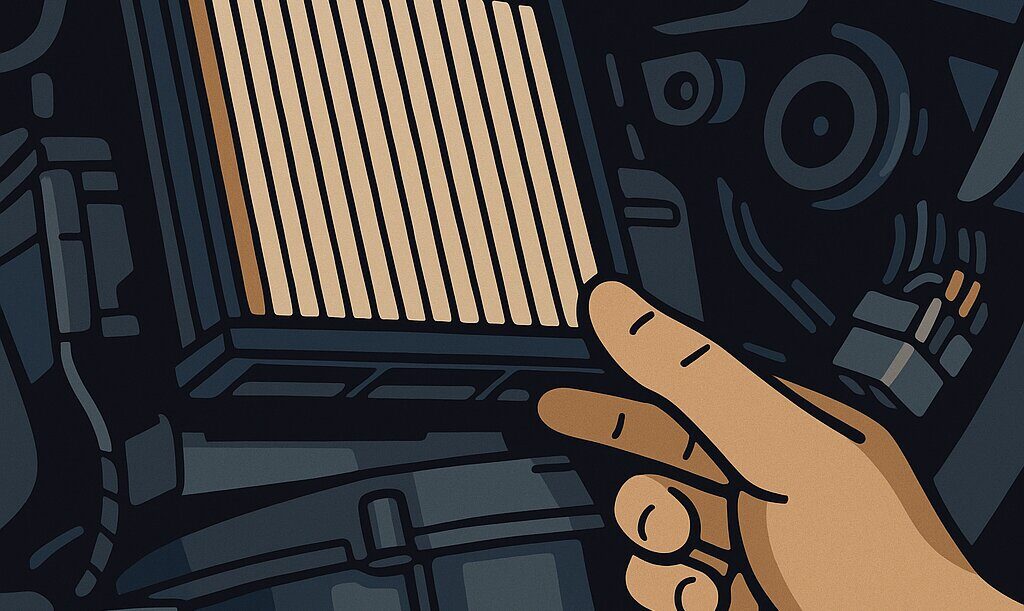
Keep your cabin air fresh and your HVAC system running smoothly! This step-by-step guide will show you how to replace the cabin air filter in your Honda Element—a quick DIY job that takes under 10 minutes, costs far less than a dealership visit, and might just save you from:
Zombie apocalypse stenches (rotting flesh? Not in your ride!).
Yeti breath (those abominable snowmen never floss).
Alien pollen (because even UFOs need to sneeze).
Because let’s face it: if the air inside your Element smells like a sock puppet’s revenge, it’s time for a new filter.
🔧 When to Replace Your Cabin Air Filter
| Model Year | Replacement Interval | Severe Duty* |
|---|---|---|
| 2003-2006 | Every 30,000 miles or 24 months | Every 15,000 miles |
| 2007-2011 | When Maintenance Minder “2” appears | Every 15,000 miles |
*Severe Duty: Driving in dusty areas, heavy traffic (soot/diesel fumes), or reduced airflow.
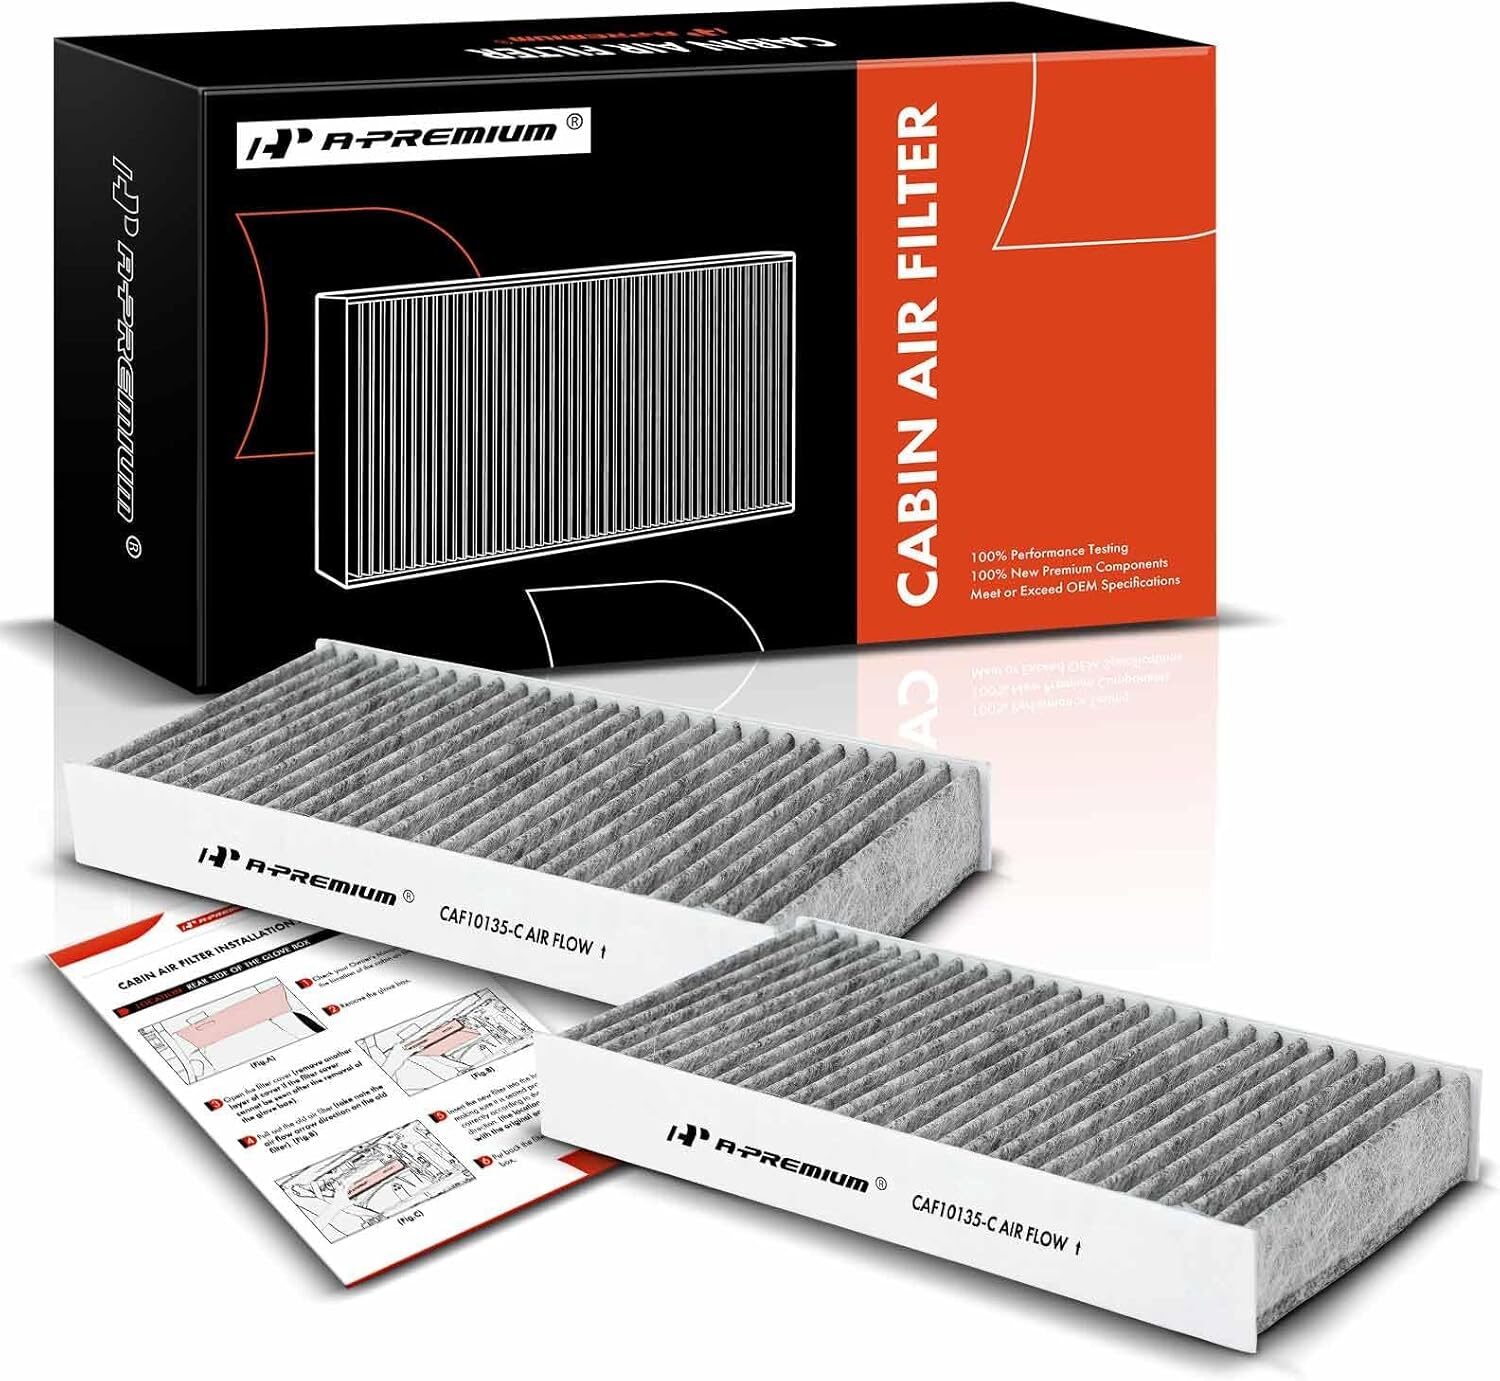
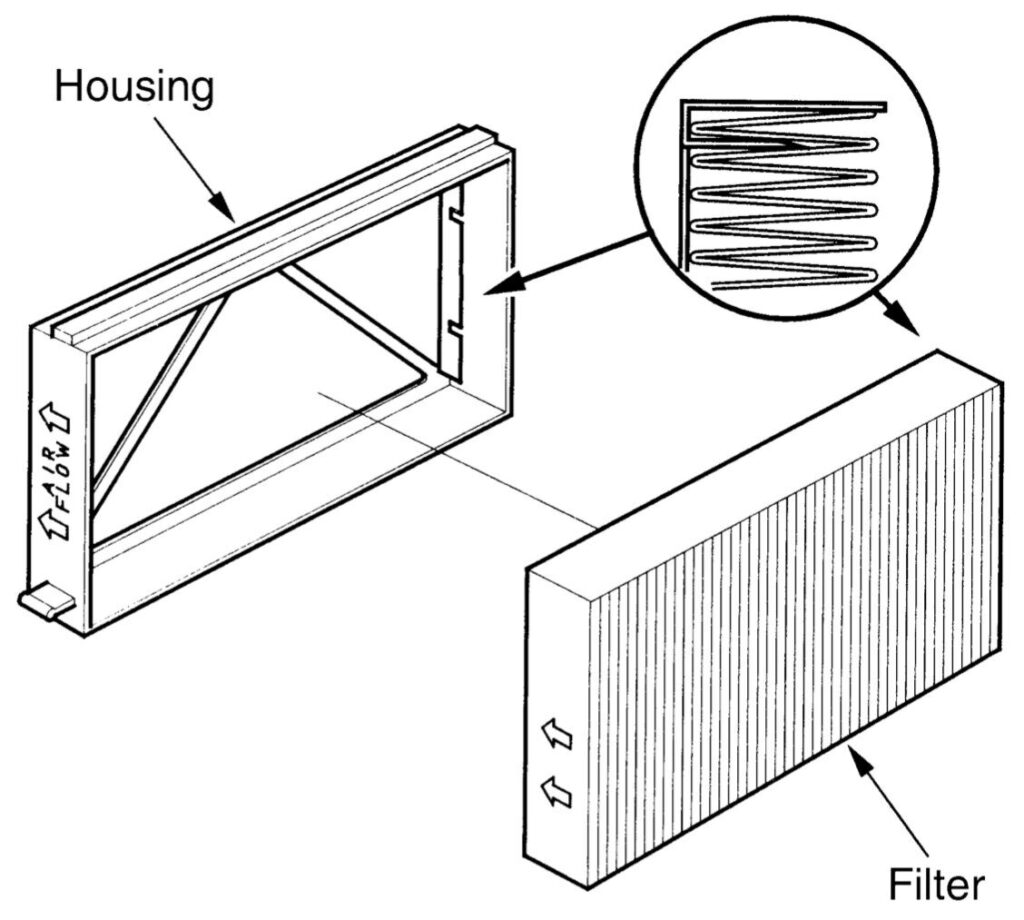
🛠️ Supplies Needed
Replace your Honda Element’s cabin air filter in minutes! This activated carbon filter (fits 2003-2011) traps dust, pollen, and odors. OEM-compatible (80292-SCV-000) – improves airflow & protects your HVAC. Easy install!
📖 Step-by-Step Replacement
Step 1: Open the Glove Compartment
- Empty the glovebox to avoid spills.
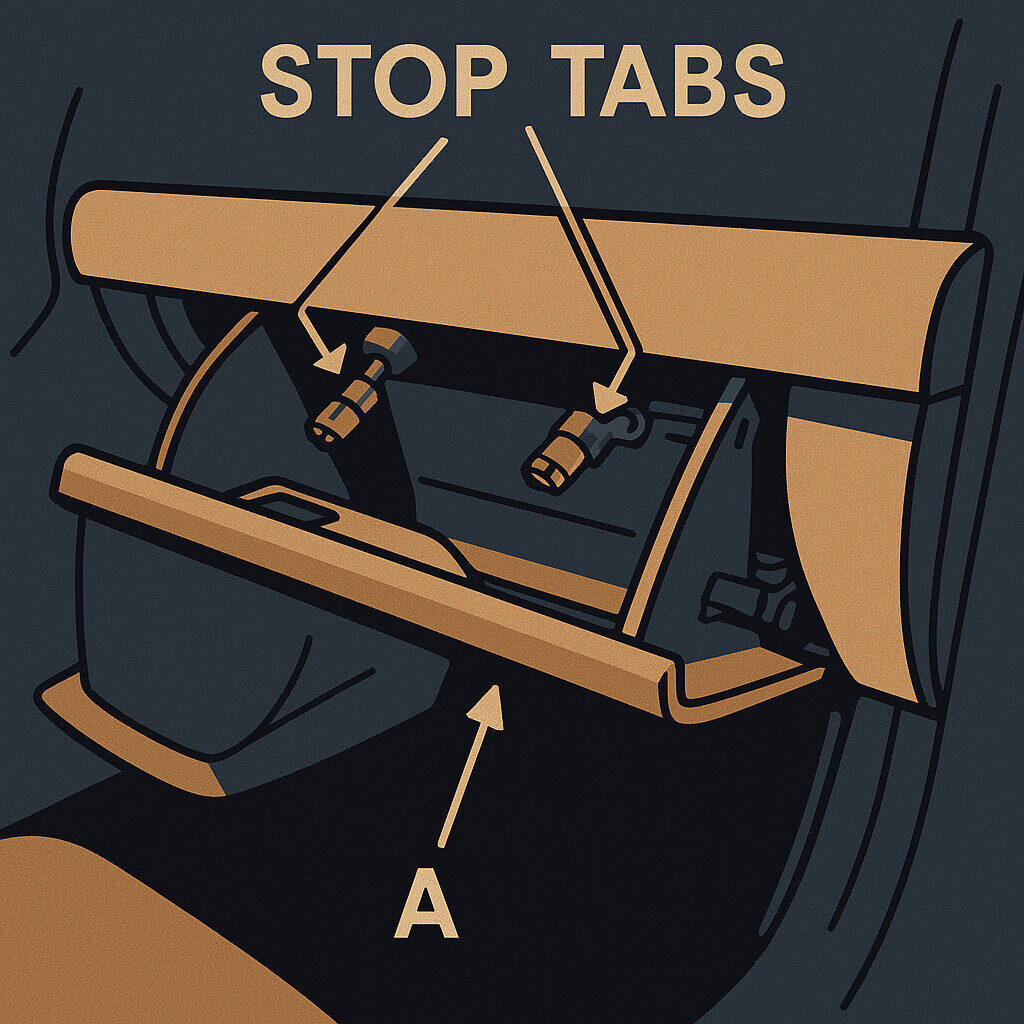
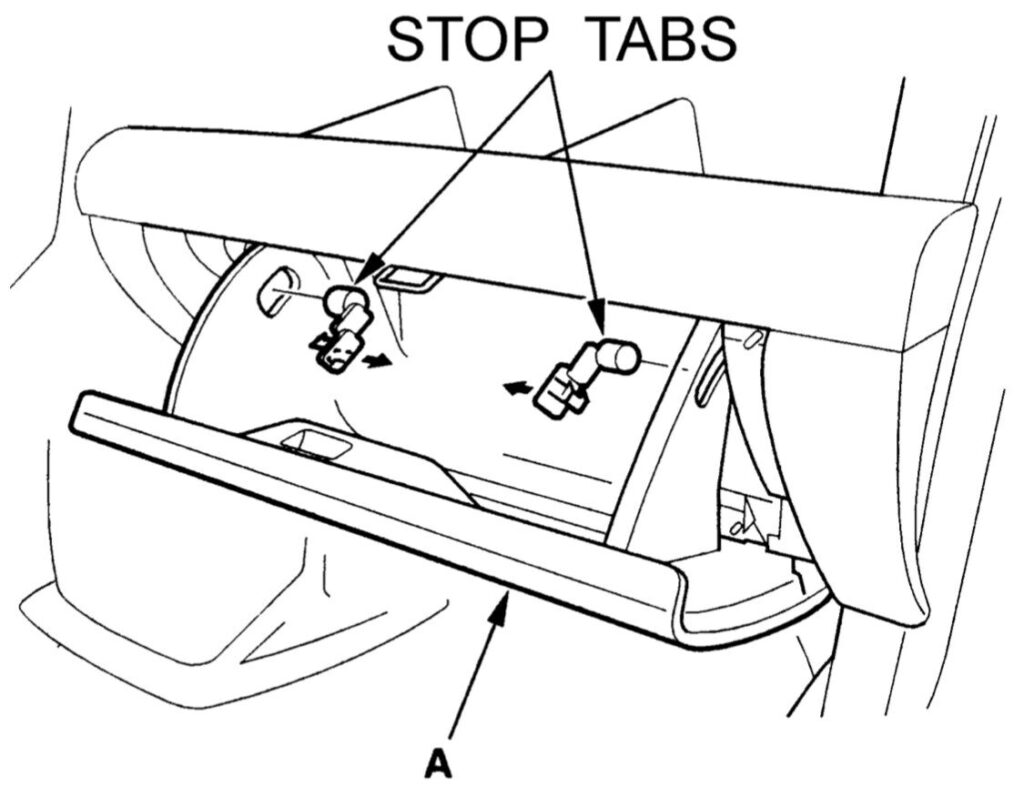
Step 2: Remove Glovebox Stops
- Locate the two plastic stoppers on each side of the glovebox.
- Pinch the tabs and pull them outward to release (Fig. 1).
- Let the glovebox hang down fully.
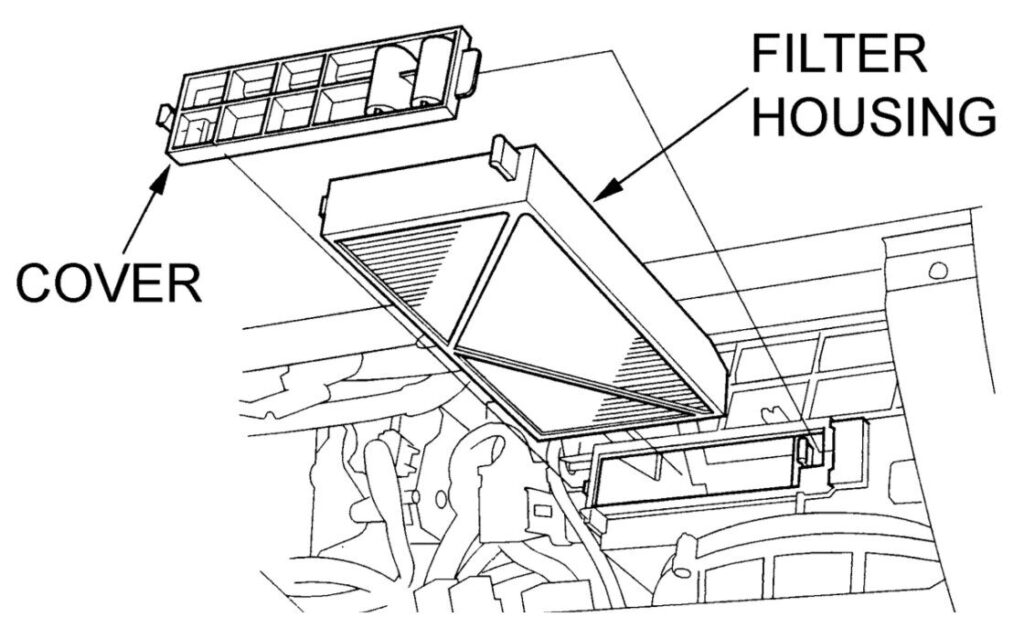
Step 3: Access the Filter Housing
- Behind the glovebox, locate the rectangular filter cover (Fig. 2).
- Unclip the cover (press the tabs inward or gently pry with a flathead).
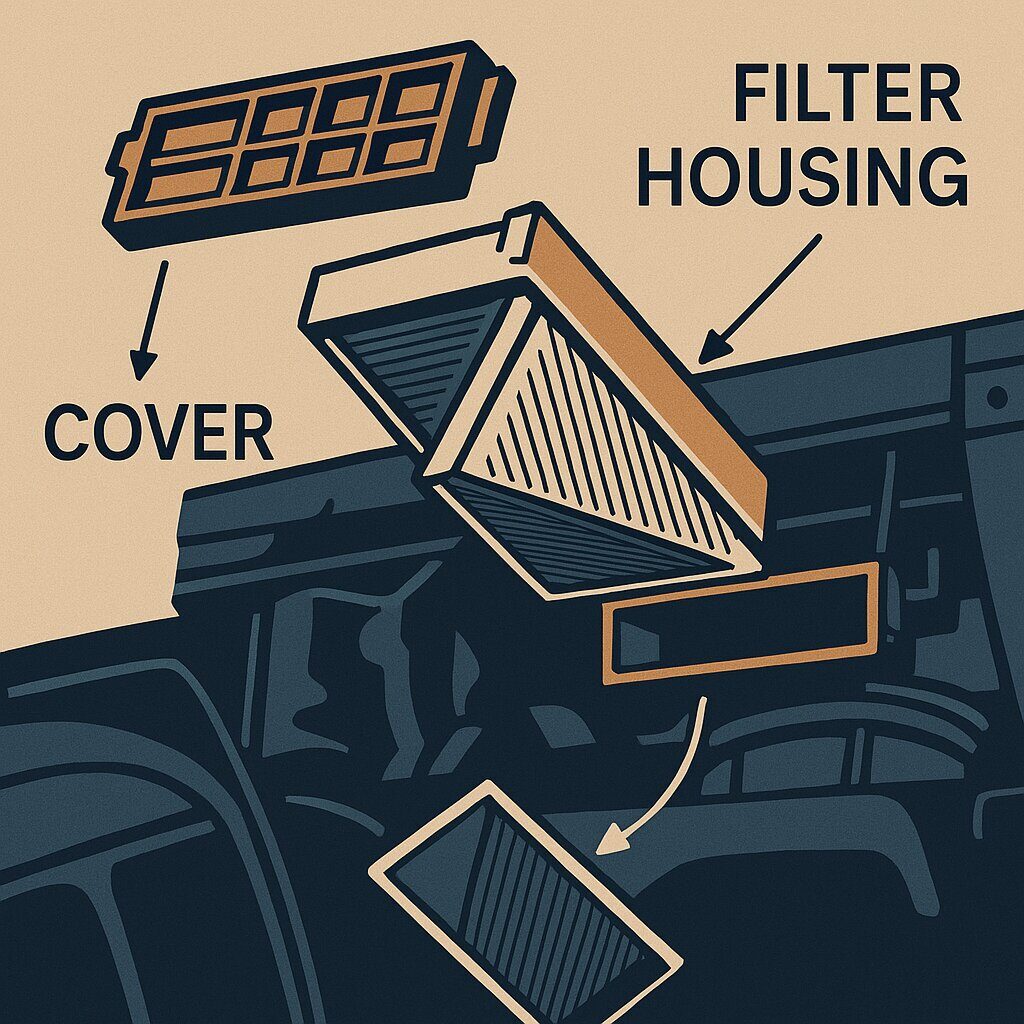
Step 4: Remove the Old Filter
- Slide out the old filter (note the airflow arrow direction).
- Inspect for debris, leaves, or mold (clean housing if needed).
Step 5: Install the New Filter
- Match the airflow arrow on the new filter with the housing marking.
- Slide it in smoothly (don’t force it).
Step 6: Reassemble
- Reattach the filter cover (click into place).
- Lift the glovebox and reinstall the stoppers.
⚠️ Pro Tips
✔ Check airflow direction – Installing backward reduces efficiency.
✔ Wear gloves – Filters can be dusty/moldy.
✔ Upgrade to activated carbon – Better for allergies/odors.
❓ Frequently Asked Questions
Q: Can I clean and reuse the filter?
A: No – Cabin filters are disposable. Cleaning damages the fibers.
Q: My glovebox won’t stay up after reinstalling.
A: Ensure the stoppers are fully clicked in. If broken, replacements cost ~$5.
Q: Where’s the best place to buy a filter?
A: OEM (Honda) or high-quality aftermarket brands like FRAM, K&N, or WIX.
📸 Visual Guide (Diagrams from Manual)

Honda Element Technical Service Bulletins
Over the years Honda has released a number of TSB's to help Honda technicians repair common problems. We got our hands on them and they are all presented here to help you fix some of these common issues at home.
Honda Element Service Manual
The ultimate guide for servicing your Honda Element. This manual will show you everything you need to know about servicing your Honda Element, from oil changes to torque specs. It also provides helpful tips to maintain your Element.

Honda Element Diagnostic Code Meanings
Full list of all of the possible OBD2 code readings that can occur when that pesky check engine light illuminates. These can give you a start to help you diagnose your Element. Code Reader Link also provided if you want to own your own reader.

How To Change Oil in a Honda Element 2003-2011
Tools & Materials Needed Pro Tips Why This MattersRegular oil changes prevent engine wear. The Honda Element’s K24 engine is reliable but thrives on timely...
Read More
Complete Honda Element Tune Up Schedule Guide
Hey Element Enthusiasts! Your Honda Element isn’t just a car; it’s a trusty companion for adventures big and small. Whether you’re hauling gear, cruising the...
Read More
Honda Element Cabin Air Filter Replacement Guide (2003-2011)
🛠️ Supplies Needed 📖 Step-by-Step Replacement Step 1: Open the Glove Compartment Step 2: Remove Glovebox Stops Step 3: Access the Filter Housing Step 4:...
Read More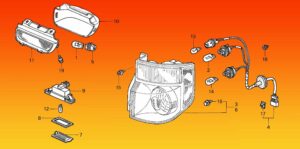
Honda Element Bulb Replacement Blowout Diagram Guide
Master Honda Element bulb replacements with our detailed blowout diagram guide! Perfect for DIYers, this visual resource covers headlight, tail light, and interior bulb locations...
Read More